添加 axruntime 组件提供更完整的运行环境
之所以将 helloworld 的 main 函数和 axhal 组合起来就能实现输出功能,是因为 helloworld 应用程序只用到了 axhal 提供的裸机输出功能, 如果我们需要支持更复杂的应用,axhal 提供的低级的裸机环境肯定不能满足我们的需求, 那么就需要用到 axruntime 这个更强大的组件了。
axruntime 的主要功能是在进入应用程序的 main 函数之前执行一些初始化操作, 根据所选择的不同 feature 执行相对应的初始化过程。
graph TD
helloworld --> axruntime --> axhal
在这一节中我们直接使用 ArceOS 的源代码,将之前修改的代码还原,在 axhal 执行完后不是直接跳转到应用程序的 main 函数, 而是跳转到 axruntime 这个组件的 rust_main 函数,再跳转到 helloworld 的 main 函数。
动手尝试
运行命令:
make PLATFORM=riscv64-qemu-virt A=apps/helloworld run LOG=debug
运行结果如下图,下面的调试输出信息绿色字体部分可以为我们直观地展示 axruntime 做的一些初始化的工作。

有了这三个组件,我们不仅能运行 helloworld 这样的简单程序,还能运行稍微复杂一些的程序。
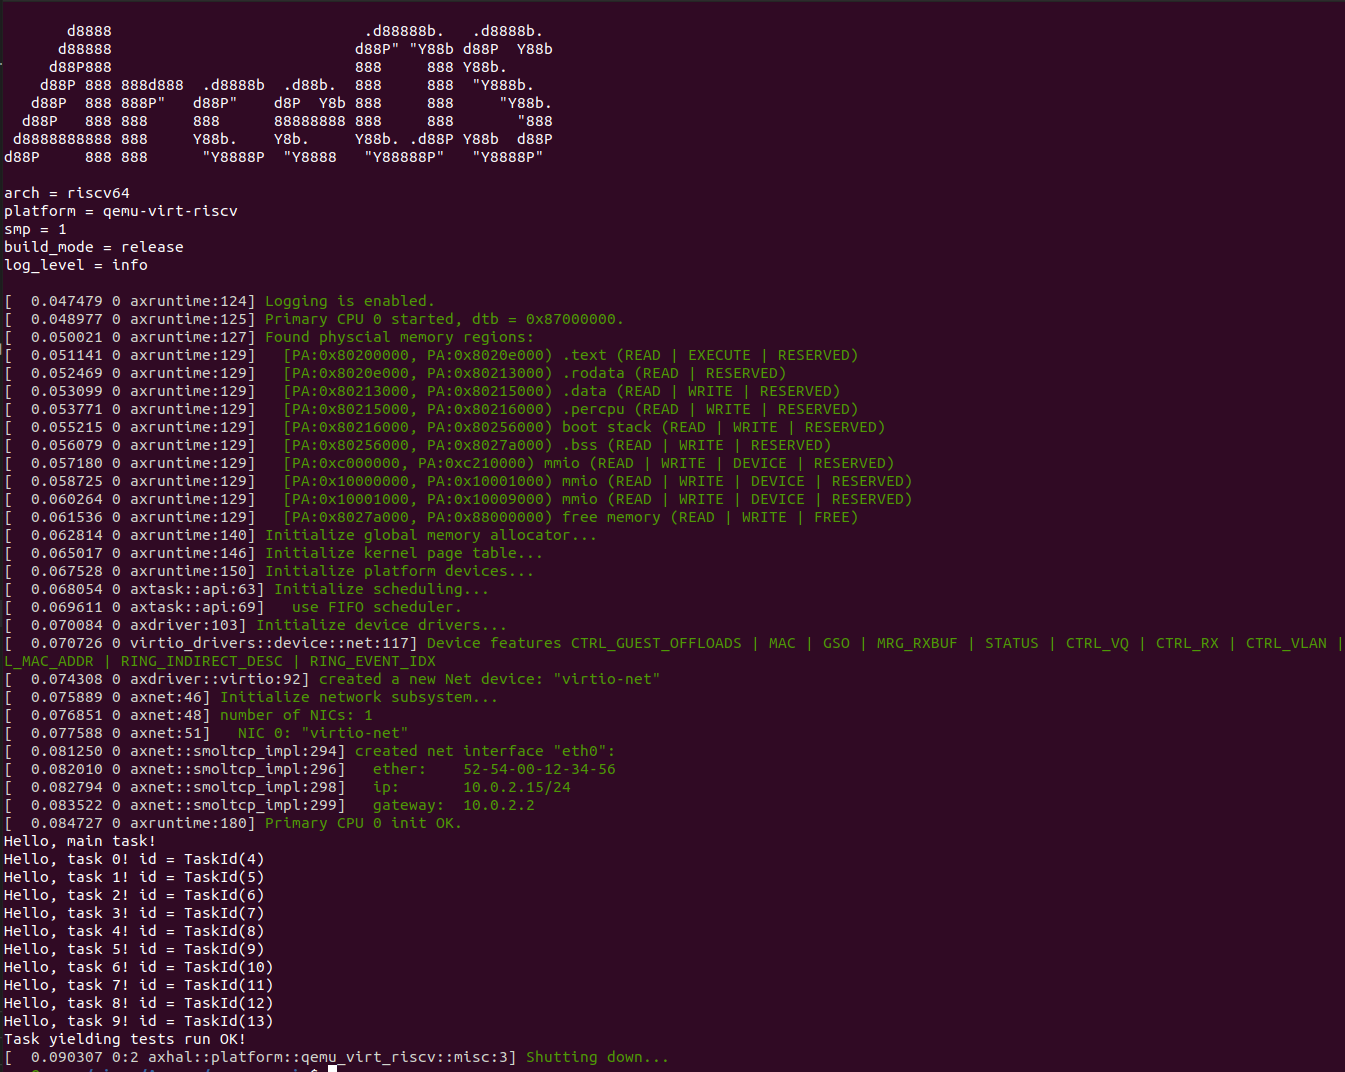
例如,运行 yield 应用程序 (FIFO scheduler):
make A=apps/task/yield PLATFORM=riscv64-qemu-virt LOG=info NET=y SMP=1 run
运行结果:

运行过程分析
让我们通过流程图看看 ArceOS 的运行背后到底发生了什么。
第一步是一些初始化函数的调用过程。
Step 1
graph TD;
A[axhal::platform::qemu_virt_riscv::boot.rs::_boot] --> init_boot_page_table;
A --> init_mmu;
A --> P[platform_init];
A --> B[axruntime::rust_main];
P --> P1["axhal::mem::clear_bss()"];
P --> P2["axhal::arch::riscv::set_trap_vector_base()"];
P --> P3["axhal::cpu::init_percpu()"];
P --> P4["axhal::platform::qemu_virt_riscv::irq.rs::init()"];
P --> P5["axhal::platform::qemu_virt_riscv::time.rs::init()"];
B --> axlog::init;
B --> D[init_allocator];
B --> remap_kernel_memory;
B --> axtask::init_scheduler;
B --> axdriver::init_drivers;
B --> Q[axfs::init_filesystems];
B --> axnet::init_network;
B --> axdisplay::init_display;
B --> init_interrupt;
B --> mp::start_secondary_cpus;
B --> C[main];
Q --> Q1["disk=axfs::dev::Disk::new()"];
Q --> Q2["axfs::root::init_rootfs(disk)"];
Q2 --fatfs--> Q21["main_fs=axfs::fs::fatfs::FatFileSystem::new()"];
Q2 --> Q22["MAIN_FS.init_by(main_fs); MAIN_FS.init()"];
Q2 --> Q23["root_dir = RootDirectory::new(MAIN_FS)"];
Q2 --devfs--> Q24["axfs_devfs::DeviceFileSystem::new()"];
Q2 --devfs--> Q25["devfs.add(null, zero, bar)"];
Q2 -->Q26["root_dir.mount(devfs)"];
Q2 -->Q27["init ROOT_DIR, CURRENT_DIR"];
D --> E["In free memory_regions: axalloc::global_init"];
D --> F["In free memory_regions: axalloc::global_add_memory"];
E --> G[axalloc::GLOBAL_ALLOCATOR.init];
F --> H[axalloc::GLOBAL_ALLOCATOR.add_memory];
G --> I["PAGE: self.palloc.lock().init"];
G --> J["BYTE: self.balloc.lock().init"];
H --> K["BYTE: self.balloc.lock().add_memory"];
I --> M["allocator::bitmap::BitmapPageAllocator::init()"];
J -->L["allocator::slab::SlabByteAllocator::init() self.inner = unsafe { Some(Heap::new(start, size)) } "];
K --> N["allocator::slab::SlabByteAllocator::add_memory: self.inner_mut().add_memory(start, size);"];
下面是 helloworld 程序的运行流程,实际上 helloworld 程序最后调用的是 axhal 封装好的输出功能,本质还是依靠 sbi 进行输出。
Step 2
graph TD;
A[main] --> B["libax::println!(Hello, world!)"];
B --> C[libax:io::__print_impl];
C --> D[INLINE_LOCK=Mutex::new];
C --> _guard=INLINE_LOCK.lock;
C --> E["stdout().write_fmt(args)"];
step 2.1
graph TD;
T["stdout()"] --> A["libax::io::stdio.rs::stdout()"];
A --> B["INSTANCE: Mutex = Mutex::new(StdoutRaw)"];
A --> C["return Stdout { inner: &INSTANCE }"];
step 2.2
graph TD;
T["stdout().write_fmt(args)"] --> A["Stdout::write"];
A --> B["self.inner.lock().write(buf)"];
B --> C["StdoutRaw::write"];
C --> D["axhal::console::write_bytes(buf);"];
C --> E["Ok(buf.len())"];
D --> F["putchar"];
F --> G["axhal::platform::qemu_virt_riscv::console::putchar"];
G --> H["sbi_rt::legacy::console_putchar"];
总结
至此,我们已经完成了从 axhal 到 axruntime 到 helloworld 的组合了,并且将 helloworld unikernel 运行了起来。
附录
-
axruntime 模块简介:
-
模块源码位置:modules/axruntime
- 功能描述:在进入应用程序的 main 函数之前执行一些初始化操作, 根据所选择的 feature 执行相对应的初始化过程。
-
流程图来源:


